Delimiter File Connector / Flat File Connector overview
This is the OOTB Connector which comes with the Sailpoint IdentityIQ Application and supports Aggregation of both the Accounts and Group object (Entitlement).
Connector Supports
- Reading data from a file which can be located locally or which is accessible from the application via FTP or SCP .
- Connector Supports files separated by a comma, semicolon, pipe or regular expression
- Supports different filtering options on the Files
- Supports the merging functionally like how multiple records can be merged into the single
- The connector also supports partition like how much records batch which will be created.
Create the 2 Sample file (Account file &Entitlement file ) sunAccount.csv and sunRole.csv before on boarding any delimiter type application.


Navigate to Applications -->Application Definition -->Add New Application
Select Application Type as DelimitedFile and set the other mandatory Attributes

2. Adding group object
Navigate to Configuration -->Setting-->Add object type

3. Account and Group Source File Information
Configure the File Path, File location, Delimiter Type and other different setting based on the file need to be on-bordered for both account and group object. refer to the below as shown in the screenshot.


4.Configure Account and Group Schema
Click on Discover Schema Attribute which will automatically populate the schema attribute for both the Account and Group Object type, this values will be populated from the Account and Group files. Make sure identity Attribute is populated this attribute is used to decide the uniqueness of the object/.
Since we have an entitlement file and the account contains the group, make sure the Role attribute on account object is set as type Role and of type entitlement and multi-valued.


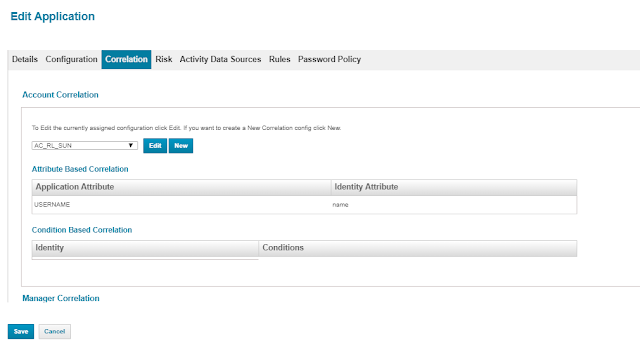
5.Correlation Configuration
Click on New and create a new Correlation rule by selecting USERNAME Attribute from the account file = name attribute from the user identity, make sure that once the rule is saved it will be visible in attribute-based correlation.
6.Aggregation Task
Creating a Group Aggregation Task
Setup -->Tasks --> New Task --> Account Group Aggregation
Make sure the Task is created with the proper selection of different options available in the task definition.

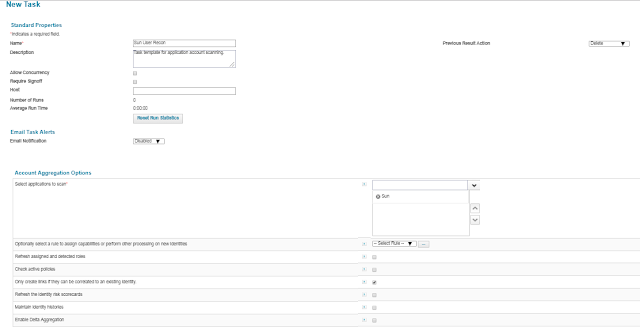
Creating an Account Aggregation Task
Setup -->Tasks --> New Task --> Account Aggregation
Make sure the Task is created with the proper selection of different options available in the task definition.
7.Confirming Correlations and Accounts
Navigate to Application --> Entitlement Catalog and see if the Entitlement is getting loaded from the Role file.

Click on New and create a new Correlation rule by selecting USERNAME Attribute from the account file = name attribute from the user identity, make sure that once the rule is saved it will be visible in attribute-based correlation.

6.Aggregation Task
Creating a Group Aggregation Task
Setup -->Tasks --> New Task --> Account Group Aggregation
Make sure the Task is created with the proper selection of different options available in the task definition.

Creating an Account Aggregation Task
Setup -->Tasks --> New Task --> Account Aggregation
Make sure the Task is created with the proper selection of different options available in the task definition.

7.Confirming Correlations and Accounts
Navigate to Application --> Entitlement Catalog and see if the Entitlement is getting loaded from the Role file.

Same way validate the Account and Entitlement of the user which is being loaded, Open the user identity from Identity warehouse and check the Application and Entitlement details of the user


